A Professional Light Setup for Headshots That Delivers
Discover the perfect light setup for headshots. Learn pro techniques, gear essentials, and classic lighting patterns for portraits that stand out.
A Professional Light Setup for Headshots That Delivers
When it comes to creating a truly professional portrait, your light setup for headshots is everything. It's the one ingredient that can single-handedly elevate a simple snapshot into a compelling, polished image. We're not just talking about making someone visible; we're talking about using light to sculpt features, communicate personality, and set a specific tone.
Why Your Headshot Lighting Is So Important
Let's get straight to it: a bad headshot can be a career killer. What’s the real difference between a photo people scroll past and one that makes them stop? Nine times out of ten, it’s the lighting. A well-thought-out light setup does more than just brighten a face—it builds an immediate sense of trust, projects competence, and shapes how someone is perceived before they've even said a word.

This isn't just about artistic preference; it has real-world consequences. Recent hiring statistics show that 85% of LinkedIn recruiters admit to dismissing poorly lit profiles in less than 7 seconds. That's a tiny window. Suddenly, understanding how to shape light becomes an essential professional skill.
Sculpting Perception with Light
Think of your main light source as a sculptor's chisel. The way you position it, and the shadows it creates, can completely change the story your portrait tells. You can accentuate a strong jawline to convey confidence or use soft, wrapping light to make someone appear more approachable and open. This control is the key to creating an image that truly reflects your subject's personal or professional brand.
The goal isn't just to light a face; it's to tell a story. Soft, broad light often suggests friendliness, while hard, directional light can create a feeling of drama, power, and intensity.
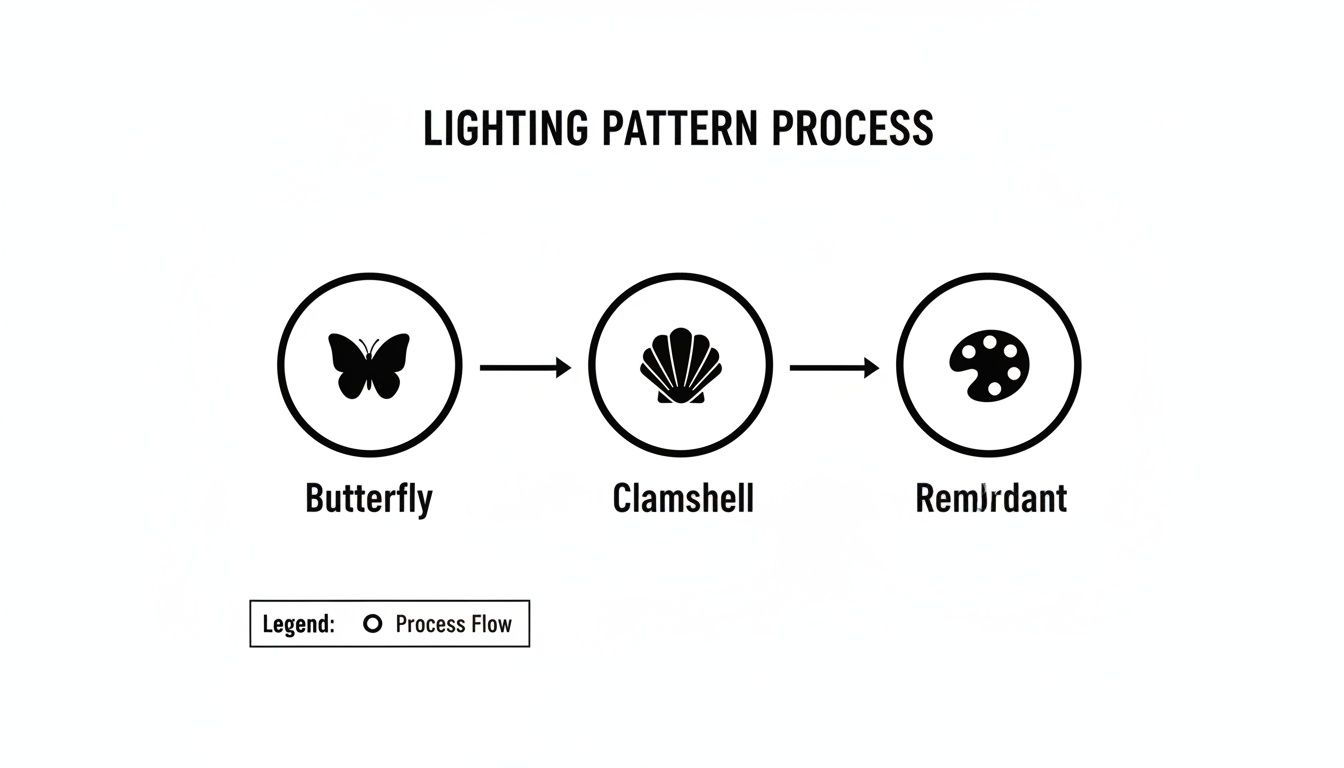
Introducing the Four Pillars of Headshot Lighting
To get these different looks, photographers have relied on a few tried-and-true lighting patterns for decades. They're the foundation of great portraiture. In this guide, we'll walk through the four classic styles every headshot photographer needs to know.
To give you a quick lay of the land, here’s a simple breakdown of the core lighting patterns we’ll be covering. Think of this as your cheat sheet for choosing the right setup for the job.
Quick Guide to Classic Headshot Lighting Patterns
| Lighting Pattern | Key Characteristic | Best For Creating Mood |
|---|---|---|
| Butterfly | A small, butterfly-shaped shadow under the nose. | Glamorous, polished, and symmetrical. |
| Clamshell | A variation of butterfly with a fill light from below. | Flattering and clean, minimizes all shadows. |
| Rembrandt | A triangle of light on the cheek opposite the light source. | Dramatic, moody, and full of depth. |
| Split | One side of the face is in light, the other in shadow. | Intense, powerful, and mysterious. |
Mastering these four foundational setups will give you a powerful toolkit for crafting any look you can imagine. If you’re hungry for more ways to level up your portraits, be sure to check out our complete guide on professional headshot advice for even more tips.
Building Your Essential Headshot Lighting Kit
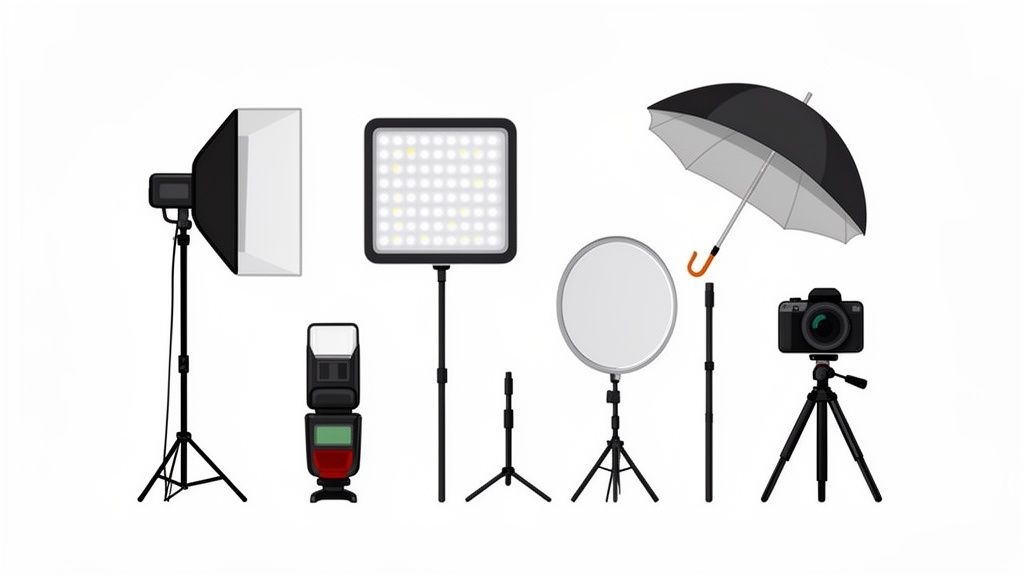
Putting together your first light setup for headshots can seem daunting. It really boils down to picking versatile pieces that play well together.
Start by asking yourself how you like to see and control your light—your choice here sets the tone for every shot that follows.
Choosing Your Light Source: Strobes vs Continuous
When you’re weighing strobes against continuous lights, think about your workflow and shooting style.
Strobes deliver a quick, powerful burst that freezes motion and lets you keep ISO low for crisp, clean results. Continuous lights (like LED panels) give you a real-time preview of shadows and highlights, making adjustments feel almost instinctual.
| Light Type | Strengths | Trade-Offs |
|---|---|---|
| Strobes | Burst power, freeze motion, minimal noise | Heavier, recycle time between shots |
| Continuous | Immediate feedback, easy to shape | Less output, may require higher ISO |
In practice, many photographers blend both—strobes for the main key light and LEDs as subtle fill or hair lights.
Shaping the Light With Modifiers
A naked bulb throws harsh shadows. Modifiers tame that glare and sculpt your subject’s features.
- Softboxes: Offer soft, directional light that gently wraps around the face. An octabox is a favorite because of its round, natural-looking catchlights.
- Umbrellas: Shoot-through versions create a dreamy diffused glow; reflective umbrellas bounce light back for a bit more punch.
- Beauty Dishes: Sit between a softbox and bare flash in terms of contrast—perfect for emphasizing cheekbones without going overboard.
- 5-in-1 Reflector: Flip through white, silver, gold, black, or translucent surfaces to bounce, warm, or flag light exactly where you want it.
Essential Support Gear
Even the best light looks awkward if it’s sagging or slipping.
- C-Stand: Rock-solid base that handles heavy modifiers without tipping.
- Reliable Trigger System: Keeps your off-camera strobes firing in sync, shot after shot.
- Sturdy Light Stands: Don’t second-guess every wobble—invest once and shoot confidently.
Many pros start with a single powerhouse light and a quality softbox. From there, you can layer in reflectors or add a second head.
For running a more streamlined setup—or to explore natural-light portraits—check out our guide on how to take professional headshots at home.
How to Master the One-Light Setup
Don't fall into the trap of thinking you need a truckload of expensive gear to take incredible headshots. Honestly, some of the most powerful and classic portraits are created with just a single light. Mastering a one-light setup is all about being intentional—it forces you to become an expert at sculpting the face with light and shadow.
This minimalist approach strips away all the complexity. You’re left to focus purely on the fundamentals: the exact position, the height, and the quality of your one light source. It’s the fastest path I know to truly understanding how light works.
The Power of Placement: Broad vs. Short Lighting
When you’re working with just one light, where you put it changes everything. Two of the most foundational techniques in any portrait light setup for headshots are broad and short lighting, and they are incredibly simple to achieve.
-
Broad Lighting: This is what happens when your light source illuminates the side of the face turned toward the camera. It creates a large, bright area of light, giving the portrait an open, welcoming feel. I often use this technique to add a bit of width to a very narrow face.
-
Short Lighting: As you can probably guess, this is the opposite. The key light hits the side of the face turned away from the camera. This carves out the face by throwing more of it into shadow, creating depth and a slimming, sculpted look. It’s my go-to for adding drama or defining facial features like cheekbones.
Switching between these two powerful looks is as easy as having your client turn their head slightly or moving your light stand from one side to the other. It’s a tiny adjustment that makes a massive difference in the final image.
Your Secret Weapon: The Reflector
Working with a single light source means you’re going to get some definite shadows. Sometimes they're perfect, but other times they can be a bit too harsh. This is where a simple reflector becomes your best friend.
Just place a white or silver reflector on the opposite side of your key light, and watch it bounce that light right back into the shadows. This is called adding “fill,” and it softens the overall contrast, bringing back detail that would otherwise be lost. You can fine-tune the effect just by moving the reflector—closer for a brighter fill, farther away for a more subtle touch.
Think of the reflector as a passive secondary light. The silver side gives you a crisp, punchy fill, while the white side offers a much softer, more diffused bounce. This gives you an incredible amount of control without ever plugging in a second flash.
In the world of professional headshots, this kind of efficiency is king. Recent trend reports show that over 60% of professional headshot sessions for platforms like LinkedIn still rely on variations of this one-light-and-reflector technique. Why? It cuts setup time down to under 5 minutes. You can dive deeper into these kinds of efficient headshot setups on digital-photography-school.com.
This proves you don’t need more gear to get better results—you just need to truly master the gear you already have. It empowers you to create headshots that look polished and professional, all with a refreshingly simple and effective light setup.
Mastering Four Classic Headshot Lighting Setups
Alright, you've got the basics of a single light down. Now for the fun part: using that knowledge to create some truly iconic and reliable looks. The following four patterns are the absolute bedrock of portrait photography. Each one has a distinct personality, and learning them gives you a powerful toolkit to handle just about any headshot client who walks through your door.
Don't think of these as strict, unbreakable rules. They're more like well-tested starting points. The real magic happens when you start making tiny adjustments to the height and angle of your light, so always, always watch how the shadows fall and what they do to your subject’s face.
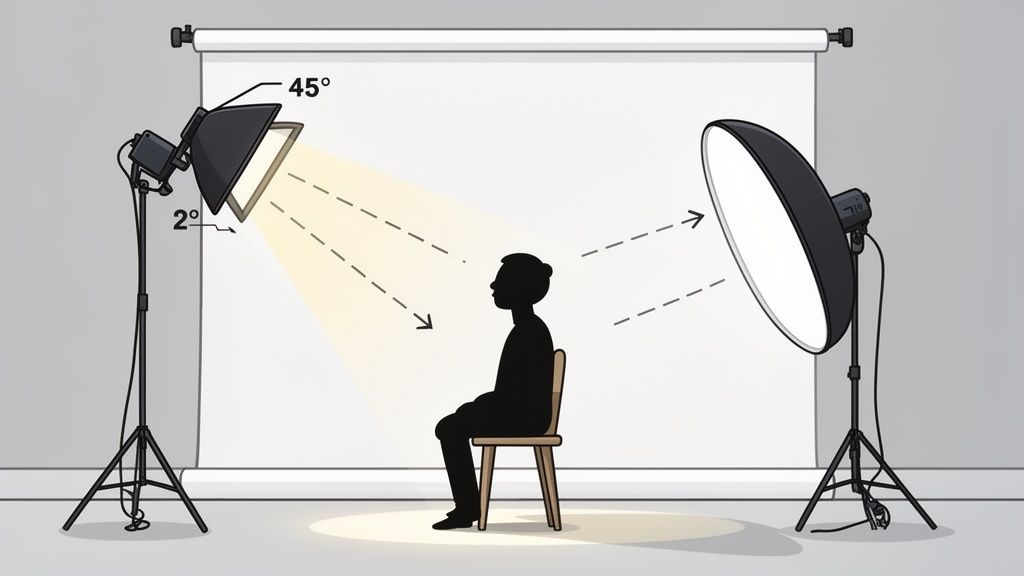
The Glamorous Butterfly
This one gets its name from that little butterfly-shaped shadow it casts right under the nose. It's the classic Hollywood glamour look for a reason—it carves out cheekbones and gives a clean, polished feel that’s perfect for beauty and fashion.
To get the butterfly look, you’ll position your key light directly in front of your subject, but high above them, aimed down at roughly a 45-degree angle.
- The Telltale Sign: That small, symmetrical shadow just beneath the nose.
- Who It Works For: Fantastic for people with high cheekbones and more angular faces (oval or heart-shaped). I'd be a bit cautious using it on rounder faces, as it can sometimes emphasize fullness under the chin.
- A Word of Warning: The height of your light is everything here. Too low, and the butterfly shadow vanishes. Too high, and you'll get deep, unflattering shadows in their eye sockets, often called "raccoon eyes."
The Flattering Clamshell
The clamshell setup is really just a beautiful evolution of butterfly lighting. It’s designed to be even softer and more forgiving, which is why it’s my personal go-to light setup for headshots for corporate or commercial clients who need to look bright, clean, and approachable. This setup is a lifesaver for minimizing shadows under the chin and eyes.
You start with the exact same butterfly placement—key light high and centered. The secret ingredient is adding a second light source or, more commonly, a reflector from below, angled up towards their face. This “fills in” the shadows created by the main light, creating that signature wraparound, or "clamshell," effect.
I almost always use a large white reflector for the bottom half of the clamshell. It kicks back such a beautiful, soft fill light without creating a second, competing catchlight in the eyes, which can sometimes look a bit strange and artificial.
Just remember to keep the fill light less powerful than your key light, usually by one or two stops. You want to soften the shadows, not blast them into oblivion.
The Dramatic Rembrandt
Named after the master painter himself, this style is all about creating a small, isolated triangle of light on the cheek that’s further away from the light source. It's a moodier, more dramatic setup that adds a real sense of depth and character to a portrait. It’s perfect for creating something with a little more soul.
Here’s how you get there:
- Start by moving your key light about 45 degrees off to one side of your subject.
- Now, raise the light so it's just a bit above their eye level, angled down.
- Ask your subject to turn their head slightly away from the light.
Nudge things around until you see that perfect little triangle of light pop onto their shadowed cheek. The classic definition is that the triangle should be no wider than the eye and no longer than the nose. If the shadows feel a bit too intense, you can bring in a reflector on the opposite side to gently open them up.
The Intense Split
Just like it sounds, split lighting slices the face into two distinct halves: one side bathed in light, the other completely in shadow. This is a bold, high-contrast look that screams power and intensity. I love using it for dramatic portraits of artists, musicians, or athletes to convey strength and a bit of mystery.
This is probably the simplest light setup for headshots to build. Just place your single light source at a hard 90-degree angle to the side of your subject, so it's perfectly in line with their face. A softbox will give you a softer edge between light and dark, while a bare bulb or grid will create a much harder, more defined line.
For maximum drama, you can place a black card or flag on the opposite side to absorb any stray light and ensure the shadow side stays truly dark and rich.
Polishing Your Headshots with Advanced Lighting
Once you’ve nailed the foundational lighting patterns, the real fun begins. It's the small, intentional details that lift a headshot from good to truly great. These advanced techniques are all about adding that last 5% of polish—creating depth, shaping mood, and making your subject pop.
Think of it like this: your key light gets the exposure right, but these extra lights are what sculpt the portrait and bring it to life.
Creating Separation with Hair Lights and Kickers
One of the most common pitfalls in headshot photography is having your subject blend into the background, especially if they have dark hair or are wearing dark clothing against a dark backdrop. The image just feels flat. This is precisely the problem a hair light or kicker is designed to solve.
A hair light is typically a small, focused light source positioned up high and behind your subject, often on a boom arm. It's not there to illuminate the scene, but simply to skim across the hair and shoulders. The result is a subtle, crisp outline that carves them out from the background.
A kicker, sometimes called a rim light, works in a similar way but comes from the side. Placing it behind and to the side of your subject creates a sliver of light along their cheek, jaw, and neck. It’s a fantastic trick for chiseling out facial features and injecting a bit of drama.
The key is subtlety. A hair light or kicker should be just noticeable enough to define an edge. If it looks like a spotlight is hitting them, you’ve gone too far. Dial it back until it feels natural.
Sculpting Mood with Lighting Ratios
The relationship between the brightness of your key light and the darkness of your shadows is defined by the lighting ratio. This isn't just a technical setting; it's your primary tool for controlling the entire mood of the portrait.
-
High-Key (Low Ratio): For a bright, airy, and optimistic vibe, you want to minimize shadows. Using a fill light that’s nearly as bright as your key light (think a 2:1 ratio) creates this effect. It’s a clean, modern look perfect for corporate headshots where approachability is key.
-
Low-Key (High Ratio): If you're after something more dramatic, moody, and cinematic, you'll want to embrace deep shadows. This means using very little, or even no, fill light. A ratio of 8:1 or higher will create that beautiful, high-contrast look that’s perfect for actors, artists, and creative professionals.
The diagram below shows how you can adapt the core patterns we discussed earlier to achieve these different moods.
Bringing the Eyes to Life with Catchlights
Never underestimate the power of a good catchlight. This is the small reflection of your light source in your subject’s eyes, and without it, a portrait can feel dull and lifeless. Catchlights add that essential sparkle, making the eyes look vibrant and drawing the viewer right in.
The shape of your catchlight tells a story about your light. A square softbox will create a square reflection, while a round octabox or umbrella will look more like the sun. I always aim for a single, dominant catchlight in each eye, usually positioned around the 10 o'clock or 2 o'clock mark.
For those moments when you need to enhance these details in post, our professional portrait presets are designed to help you add that final touch of sharpness and polish to the eyes.
Frequently Asked Questions About Headshot Lighting
Every headshot photographer runs into the same handful of tricky situations, especially when it comes to lighting. Here are my go-to solutions for some of the most common questions that pop up during a shoot.
What’s the Best “Do-It-All” Light Modifier?
If I had to pick just one modifier to have on a desert island, it would be a medium-sized octabox, somewhere in the 36 to 47-inch range. You just can't beat its versatility.
It gives you that beautiful, soft, wrapping light that’s incredibly flattering on all face shapes. Plus, it creates those nice, round catchlights in the eyes that really bring a portrait to life. It's the perfect workhorse for almost any look you're trying to achieve.
How Can I Get Rid of Glare on Glasses?
Ah, the dreaded glasses glare. It's a classic problem, but the solution is all about playing with angles. Your goal is to make sure the reflection of your light source isn't bouncing straight back into your lens.
Here are a few things to try, usually in combination:
- Lift your key light higher than you normally would and angle it down.
- Have your subject dip their chin just a bit.
- Shift the light further off to the side.
It’s a bit of a dance. You'll need to make tiny adjustments to the light and the person's pose until you find that perfect spot where the glare vanishes.
A quick note on image noise: Don't be afraid to bump up your ISO. A noisy image is often the result of underexposing the shot, not just a high ISO. It’s always better to get the exposure right in-camera, even at a higher ISO, than to try and brighten a dark photo later. Pushing shadows in post is what really makes noise stand out.
Is It Okay to Use Natural Window Light?
Absolutely! A large window with indirect light is basically a giant, free softbox. It can produce some of the most beautiful and authentic headshots you'll ever take.
For a classic look, position your subject so they are turned about 45 degrees to the window. This creates soft, directional light with gentle shadows. To complete the setup, place a white reflector (a simple piece of foam core is perfect) on the shadow side to bounce some of that light back and soften the contrast.
Ready to create stunning, AI-generated headshots and product photos in seconds? Visit 43frames and discover how our advanced creative studio can transform your vision into polished, on-brand visuals instantly. Explore our full library of styles and generate your first images for free.