How to Take Professional Headshots at Home a Complete Guide
Learn how to take professional headshots at home with your phone or camera. This guide covers lighting, backdrops, posing, and editing for a perfect result.
How to Take Professional Headshots at Home a Complete Guide
Your headshot is often the very first impression you make in a professional setting. It’s your digital handshake on LinkedIn, the face of your personal brand, and a key part of how colleagues and clients perceive you. A great photo projects confidence and approachability long before you’ve even met.
The demand for high-quality headshots is surging. The global market hit $1.2 billion in 2023 and is expected to more than double by 2030. This isn't just a trend; it's a reflection of how vital a strong visual presence has become in our digital-first world.
Thankfully, you no longer need to book an expensive studio session to get a fantastic result. This guide breaks down two effective ways to create a professional headshot right from home.
Two Paths to a Perfect Headshot
We're going to walk through two distinct approaches. One is a hands-on, traditional method, while the other uses new technology to get the job done quickly and consistently. You can choose whichever one aligns best with your goals, timeline, and comfort level.
-
The DIY Photography Method: If you enjoy having creative control and want to learn a new skill, this is for you. We’ll cover everything you need to know to use your smartphone or DSLR camera—from finding the best light and setting up a simple background to nailing your pose and camera settings.
-
The AI-Powered Method: For anyone who needs guaranteed, studio-perfect results without the hassle, AI platforms like 43frames are a game-changer. You just upload a handful of your everyday photos, and the AI generates an entire gallery of professional headshots in minutes. It completely removes the guesswork.
The real goal here is to give you the know-how to either capture a brilliant self-portrait on your own terms or use technology to achieve the same polished outcome. Both paths lead to an image that will seriously elevate your professional presence.
Let's quickly compare these two options side-by-side to help you decide which route to take.
DIY vs AI Headshots at a Glance
| Feature | DIY Photography | AI Generation (like 43frames) |
|---|---|---|
| Speed | Can take several hours (setup, shooting, editing) | Results in minutes |
| Cost | Free (using existing gear) to low-cost (for minor accessories) | Small one-time fee |
| Consistency | Varies; can be challenging to get multiple great shots | High; generates dozens of consistent, high-quality options |
| Control | Full creative control over lighting, pose, and setting | Control over input photos and style selection |
| Equipment | Smartphone or DSLR, tripod (recommended), light source | Just need a few existing casual photos on your phone |
| Skill Level | Basic photography and editing skills are helpful | No technical skills required at all |
Ultimately, both methods are powerful ways to get the job done. The DIY route is rewarding and teaches you valuable skills, while the AI approach delivers professional quality and variety with unbeatable speed.
Whether you're a hands-on creative or a busy professional who needs results now, this guide has you covered. And if you do go the DIY route and want to add that final professional sheen, editing presets can make a world of difference. For a deeper dive, check out our guide on LinkedIn and portrait presets to really make your images pop.
Setting Up Your At-Home Photo Studio
You really don't need a dedicated professional studio to get polished, impressive headshots. Honestly, the secret to a great at-home session is just carving out a small corner of your space and getting two things right: good light and a clean background. It’s far simpler than it sounds.
Finding the Perfect Light and Spot
First things first, let's find your location. The best way to do this is to take a walk through your home during the day, specifically looking for your largest window. What you're hunting for is a spot with tons of indirect natural light. Direct, harsh sunlight is your enemy here—it creates deep, unflattering shadows. A north-facing window is often the gold standard for this, but really, any window that doesn't have the sun blasting directly through it will do the trick.
You want that light to be soft and even, almost like it's wrapping around you. Think of the window as a giant softbox, which is just a fancy tool photographers use to diffuse light. If you find the sun is still a little too intense, you can easily knock it down. Just hang a thin, white bedsheet or a sheer curtain over the window. This one simple move transforms those harsh rays into a beautiful, gentle light source that will flatter your face.
Nailing the Background
Once you've got your light sorted, it’s time to deal with the background. Nothing screams "amateur photo" faster than a busy, distracting background. The goal here is simple: keep it clean and free of clutter.
The path of least resistance is a plain, neutral-colored wall. I find that light gray, off-white, or even beige walls work wonderfully because they don’t reflect weird colors onto your skin tone. They just let you be the star of the show. Before you start shooting, give the area a quick once-over:
- Declutter: Take down any posters, distracting art, or that cuckoo clock from the wall.
- Hide the evidence: Frame your shot so you can't see outlets, light switches, or messy cords.
- Scan for scuffs: Check for any marks or blemishes on the wall that might be visible in the final picture.
My Go-To Trick: Don't have a pristine wall? Don't sweat it. Create your own. A solid-colored bedsheet or a large piece of fabric works wonders. Just make sure you pull it taut and secure it with clamps or tape to get rid of any wrinkles. A classic gray or navy blue sheet always looks sharp and professional.
Assembling Your Gear
Okay, let's talk equipment. You can get fantastic results with either a modern smartphone or a DSLR camera. But the single most important piece of gear—even more than the camera itself—is something to keep it steady. A shaky hand means a blurry photo, and that's the last thing you want for a professional headshot.
A tripod is your best friend for this. It keeps the camera perfectly still and lets you use a self-timer, so you can focus on your pose instead of fumbling with your phone.
No tripod? No problem. Get creative. A stack of books on a sturdy table or a countertop can work just as well. The main objective is to get your camera lens right at eye level. Looking down at the camera often feels awkward, and trust me, shooting from a low angle is rarely flattering for anyone.
Here’s a quick rundown of what you'll need to have ready:
- Your Camera: A smartphone with Portrait Mode or any DSLR/mirrorless camera.
- A Stabilizer: A tripod is ideal, but a stable surface like a stack of books is essential.
- Light Source: That big window with soft, indirect natural light.
- Light Modifier (Optional): A white sheet or curtain to soften sunlight if needed.
- Background: A clean, neutral wall or a solid-colored sheet.
And that’s it. With these simple pieces in place, you’ve just built your own mini-studio. It's all the foundation you need to start capturing high-quality images, proving that you don't need a bunch of expensive gear—just a bit of resourcefulness and a good eye for light.
Mastering Your Lighting and Camera Settings
Let's get one thing straight: lighting isn't just part of photography. It's everything. It's the single biggest factor that separates a quick snapshot from a professional portrait. If you can get the light right, you're 90% of the way to a killer headshot. The good news? You absolutely don't need a studio full of expensive strobes to get there.
Your best friend for this project is a big window. The soft, indirect light it provides is incredibly flattering. It wraps around your face, smooths out features, and kills harsh shadows. Think of it as a giant, free softbox. For the best effect, stand facing the window, but turn your body at a slight 45-degree angle to it. This creates a gentle play of light and shadow that adds dimension.
Now, to take it up a notch, let's manage those shadows. The side of your face turned away from the window will naturally be a bit darker. Grab a piece of white foam board or even a plain white t-shirt stretched over a chair back. Place this "reflector" just out of the camera's frame on the shadowy side of your face. It will bounce that beautiful window light right back, filling in the shadows for a balanced, polished look. It’s a simple trick, but it works wonders.
This basic setup—your light source, your background, and your camera—is the foundation for any great at-home headshot.

This diagram breaks it down visually. It’s all about using the right technique, not having the most expensive gear.
What If Natural Light Isn't an Option?
No big window? No problem. You can get creative with what you already have. Find a lamp, preferably one you can move around easily like a desk lamp. A bare bulb on its own is way too harsh, so we need to soften, or "diffuse," that light.
Drape a thin white t-shirt or a sheet of parchment paper over the lampshade (or a safe distance in front of the bulb). This will scatter the light and create a much softer, more flattering effect that mimics a window. A word of caution: make sure the material never touches the hot bulb directly. Safety first.
Essential Camera Settings for Smartphones
Your phone's camera is incredibly capable, but you have to take it off autopilot. A few quick adjustments will elevate your photos from casual to professional.
- Portrait Mode is Your Friend: This is a must. It uses software to blur the background, creating that professional separation between you and your surroundings that you'd typically get from a pricey DSLR lens.
- Lock Your Focus and Exposure: Once you're framed up, tap and hold on your face until you see an "AE/AF Lock" box pop up. This is a game-changer. It stops the camera from constantly readjusting the focus and brightness as you shift slightly, giving you consistent results.
- Tweak the Brightness Manually: After you lock focus, a little sun icon usually appears next to the focus box. Slide your finger up or down on the screen to fine-tune the exposure. You're aiming for a bright, clean image, but be careful not to "blow out" the highlights, where the brightest parts of your skin lose all detail.
Taking professional headshots at home has become more than a convenience; it's a vital skill. With remote work becoming the norm, the demand for high-quality, accessible headshots has exploded, completely reshaping the professional photography market.
Key Settings for DSLR and Mirrorless Cameras
If you’re working with a dedicated camera, you’ve got more creative control. It might seem intimidating, but for a great headshot, you really only need to dial in three core settings.
- Aperture (f-stop): This is what creates that beautifully blurred background. Set your aperture to a low f-number, somewhere between f/1.8 and f/4. This will throw the background out of focus (an effect called "bokeh") and make you the undeniable center of attention.
- ISO: Think of ISO as your camera's sensitivity to light. You want to keep this as low as you can to avoid ugly digital "noise" or grain. Stick to ISO 100-400 for the cleanest, sharpest image possible.
- Shutter Speed: This needs to be fast enough to freeze motion and avoid any blur from your movement or an unsteady hand. A good starting point is 1/125th of a second, but go faster if you can.
By getting a handle on these simple lighting and camera techniques, you’re no longer just taking a picture—you’re creating an image. This is the foundation that empowers you to produce sharp, beautifully lit, and truly professional headshots, whether you're using a phone or a DSLR.
And for those looking to speed up their editing workflow later, check out our guide on achieving a natural light portrait look with presets.
Posing and Framing to Look Your Best
Okay, you've got the technical side sorted out. Now it's time to focus on the real star of the show: you. How you pose, frame the shot, and connect with the camera is what turns a good picture into a great headshot—one that projects confidence and makes you look approachable. It’s all about looking relaxed and natural, even if you feel a little awkward at first. Trust me, everyone does.
The biggest mistake I see is people facing the camera head-on, shoulders squared, like they're about to have their passport photo taken. This is the fastest way to look rigid and unwelcoming.
Instead, try this: turn your body about 45 degrees away from the camera, then bring your head back to face the lens. This simple twist instantly creates a more dynamic and flattering angle, adding depth to the shot.
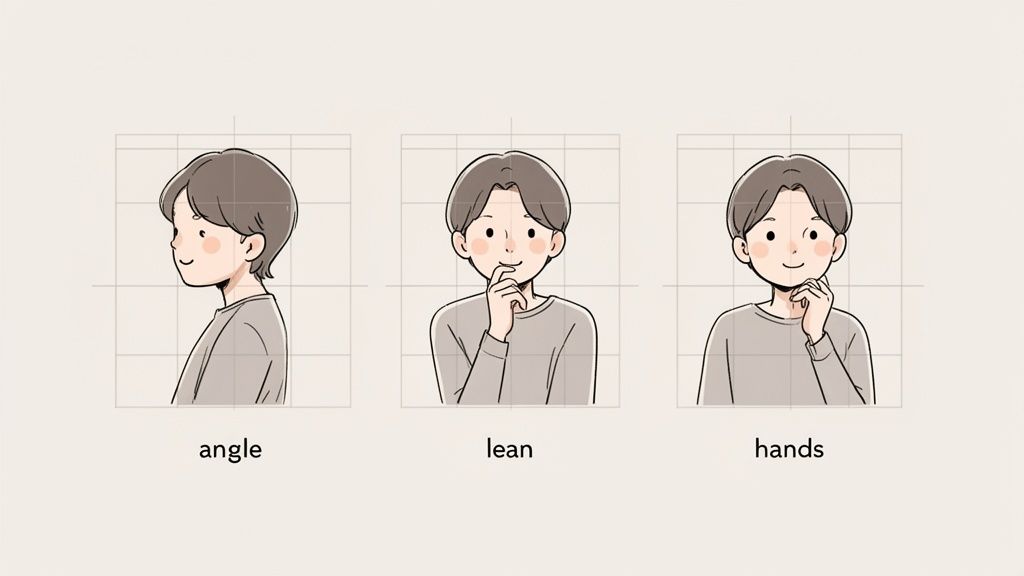
See how much more engaging that feels? It's less confrontational and invites the viewer in. Now you have a great starting point to experiment with smaller movements.
Finding Your Best Angle
We all have a "good side," and finding it is just a matter of playing around. Once you're in that three-quarters stance, try tilting your head just a little to one side or the other. Here's another powerful trick I tell all my clients: gently push your forehead toward the camera and dip your chin down just a tiny bit.
I know, it feels completely unnatural. But from the camera's perspective, this one weird move works magic:
- It defines your jawline. This tightens the skin under your chin, creating a sharper, more defined look.
- It engages your eyes. This angle makes your eyes seem wider and more connected to the lens.
Don't go overboard; a subtle shift is all you need. The goal is to avoid the dreaded "double chin" effect while creating a powerful, direct gaze.
The Art of a Genuine Expression
Nothing ruins a headshot faster than a forced smile. A genuine expression comes from a real feeling, so you have to give your brain a reason to create one. Forget "say cheese." Instead, think about something that genuinely makes you happy—a hilarious memory, your favorite person, a project you're proud of.
Let a natural, slight smile emerge from that thought. Often, a closed-mouth smile or even a subtle smirk comes across as more confident and authentic than a huge, toothy grin. The real secret is in your eyes. When you're truly smiling, the muscles at the corners of your eyes will crinkle. This is called a Duchenne smile, and it’s the universal signal for genuine happiness.
Pro Tip: Set your camera's self-timer for 10 seconds. In between each shot, close your eyes, take a deep breath, and think of your happy thought. Open your eyes right before the shutter clicks. This little reset prevents your expression from looking frozen or strained.
Composition Rules That Work Every Time
How you position yourself in the frame is just as crucial as your pose. The most timeless trick in the book is the rule of thirds. Imagine your screen has a tic-tac-toe grid over it. Instead of sticking your face in the dead center, line your eyes up with the top horizontal line.
This simple shift creates a more visually balanced and compelling image. Most smartphone cameras have a grid overlay you can switch on in the settings to make this incredibly easy.
While you're framing, keep these two things in mind:
- Mind your headroom. Leave a small, comfortable amount of space above your head. Too much can make you look small and unimportant, while too little feels cramped.
- Crop for impact. A classic headshot is typically framed from the chest up. This composition puts all the focus right where it belongs: on your face and your expression.
By combining a dynamic pose, a genuine expression, and strong composition, you're not just taking a picture—you're guiding the viewer's eye and telling a story. This is how you transform a simple self-portrait into a professional headshot that truly represents you at your best.
Polishing Your Headshots in Post-Production
The real magic often happens after the camera clicks. This final editing stage isn't about altering who you are; it's about making subtle tweaks to ensure the final image is polished, professional, and presents the best version of you. And you don't need to be a Photoshop wizard to do it. User-friendly tools like Snapseed, Canva, or even your phone’s native photo editor have all the power you need.
Your first job is to get the crop right. This is one of the most powerful edits you can make. A good crop eliminates distracting background noise and pulls the viewer’s focus right where it belongs: on you. A classic headshot crop starts around the mid-chest, leaving just a little bit of breathing room above your head.
Dialing in the Basics
With your framing set, it's time to fine-tune the light and color. These small adjustments can take a photo from "pretty good" to "wow, that looks professional."
The aim is always a clean, bright photo that feels authentic. Start with these fundamental tweaks:
- Brightness and Contrast: I usually start by bumping the brightness just a little to make the photo feel more inviting. A small dash of contrast can then make the details stand out, but don't overdo it, or you'll get deep, unnatural shadows.
- Color Correction: Ever notice how indoor photos can look a bit yellow or blue? That's the white balance. Use your editor's "temperature" or "white balance" slider to correct this. The goal is to make your skin tone look as it does in real life.
- Saturation: A tiny boost here can enrich the colors, but be very careful. Pushing the saturation too far is a dead giveaway of an amateur edit.
Remember, the point of editing is to enhance, not to deceive. Your headshot should look like you on a really good day—an authentic, polished version of the person people will meet.
The Art of Subtle Retouching
There's always a temptation to go overboard with retouching—smoothing every line, erasing every freckle. Resist it. Heavy-handed editing looks fake and can actually undermine your credibility.
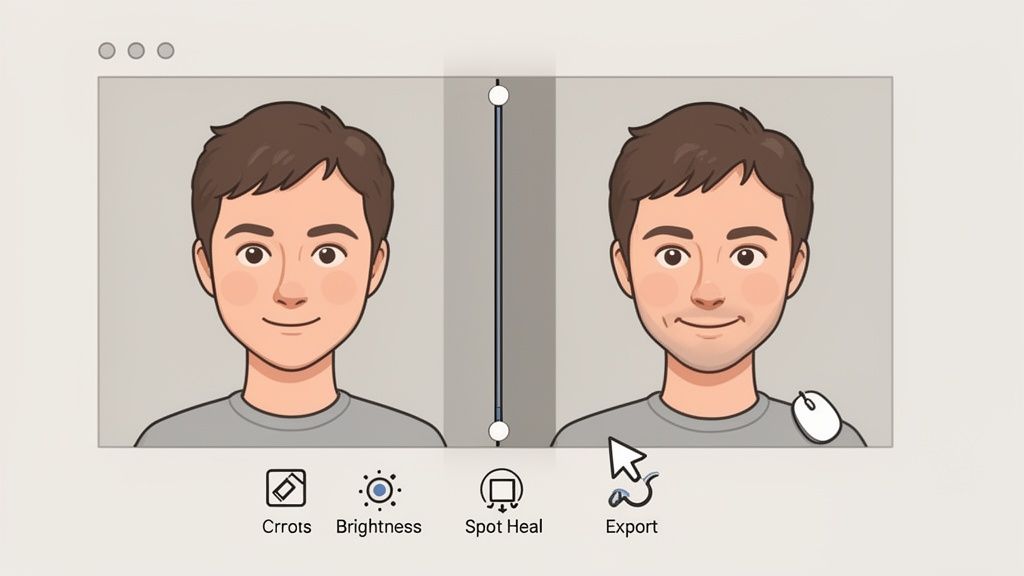
Think of it as tidying up, not remodeling.
If you have a temporary blemish or a stray hair that’s bugging you, use a spot healing tool to gently remove it. What you want to avoid at all costs is blurring your skin. This completely removes natural texture, creating that plastic, uncanny-valley look that screams "over-edited." The goal is a believable, authentic final image.
Once you’re happy with the result, it's time to export. For any online use, like a LinkedIn profile, a JPEG file is the standard. Make sure your final image is at least 1080x1080 pixels to keep it looking sharp, even on high-resolution screens. Getting this final step right ensures all your effort translates into a crisp, professional headshot.
The Smart Alternative: AI-Generated Headshots
Mastering the art of the DIY headshot is a fantastic skill, but let's be realistic—sometimes you just need a perfect, studio-quality photo right now. You don't have time to mess with lighting, backgrounds, and editing.
For busy professionals, entrepreneurs, or entire teams who need a consistent look, there’s a much faster way: AI-generated headshots. This approach completely sidesteps the traditional process and delivers a whole portfolio of polished images in minutes.
Platforms like 43frames were built for exactly this scenario. They've created a solution that doesn't require any camera gear, lighting know-how, or editing skills. Honestly, it's one of the easiest ways to get a professional headshot from the comfort of your home.
So, How Does This Actually Work?
The concept behind it is refreshingly straightforward. You just need to give the AI a handful of casual photos of yourself. We're talking selfies, vacation pictures—any clear shots that show your face from a few different angles will do the trick.
The AI model learns your unique facial features from those initial photos. After that, you pick a professional style you're going for, and the system does the rest.
Within a few minutes, it generates a wide variety of brand-new, studio-quality headshots. They look authentically like you, but with perfect lighting, professional outfits, and clean backdrops.
This screenshot from 43frames gives you a sense of the different styles you can choose from to match your personal brand or company vibe.
The whole process is incredibly intuitive. You just scroll through different professional looks and select the ones that fit your needs before the AI starts creating your images.
Why Go with AI? The Benefits Are Hard to Ignore
If you're weighing your options for getting a professional headshot at home, the AI route has a few standout advantages.
-
Massive Time and Cost Savings: A traditional photoshoot can easily run you hundreds of dollars and eat up half your day. The DIY method is cheaper, but the time commitment is still significant. AI platforms give you a full portfolio for a fraction of the cost, and you get the results in minutes, not days.
-
Guaranteed Consistency: I can tell you from experience that getting multiple DIY shots with the exact same lighting and angle is a massive pain. AI nails this every time, creating dozens of options with a perfectly uniform look. This is a game-changer for teams needing cohesive headshots for the company website.
-
Zero Technical Skill Required: Forget about aperture, ISO, or lighting ratios. If you can upload photos to a website, you have all the skill you need to get a professional headshot.
The real value here is getting top-tier results without the usual headaches. You get the sharp focus, flattering light, and clean background of a professional shoot, but you skip all the logistical planning.
This technology isn't just a gimmick; it's a reflection of where the market is heading. North America has become a huge market for professional headshot services, largely because people are quick to adopt smart, tech-driven solutions like AI. If you're curious about the data behind this, it's worth checking out the full market report on professional headshot photography services.
Ultimately, this method is about using technology to hit a specific goal faster and more reliably. If your top priority is getting a perfect, consistent, and instant result, AI is an incredibly smart choice.
To get a better sense of how AI can rework existing photos into something entirely new, you might find our deep dive into image-to-image AI technology really interesting.
A Few Common Questions I Hear All the Time
Even with the best guide in hand, there are always a few lingering questions that come up when people tackle their own headshots. Let's clear up some of the most common ones so you can get started with total confidence.
"What Color Should I Wear for My Headshot?"
This is probably the question I get asked most. My advice is almost always the same: stick with solid, neutral, or deep jewel tones. Think navy blue, charcoal gray, forest green, or a rich burgundy. These colors are classic for a reason—they look great on just about everyone and keep the focus where it should be: on your face.
A few things I'd steer clear of:
- Busy Patterns: Loud stripes, intricate florals, or sharp checks tend to pull the eye away from you.
- Big Logos: Unless it's your own company's logo, it's best to avoid turning your headshot into a free ad.
- Colors that Match Your Skin Tone: A beige or tan top can sometimes make you look washed out, especially depending on the lighting.
But here's the real secret: the best thing you can wear is something that makes you feel fantastic. When you feel confident and comfortable, it shows. That energy will come through in the final photo more than any specific color ever could.
"Can I Seriously Get a Pro-Level Shot With Just My Phone?"
You absolutely can. I've seen some incredible headshots taken on smartphones. Modern phone cameras are amazing, and features like Portrait Mode give you a huge head start.
The truth is, a professional result doesn't come from an expensive camera body. It comes from controlling the three things that really matter: lighting, background, and composition.
If you take the time to set up by a window for that soft, natural light, find a simple background that doesn't distract, and frame yourself thoughtfully using the rule of thirds, you can capture a photo that holds its own against one from a pricey DSLR. It’s all about a little bit of technique, not the tech in your hands.
Your phone's camera is a powerful tool. Once you learn the fundamentals of what makes a great photo—especially how to find and shape good light—you’ll realize it's more than capable of producing a polished, high-quality headshot.
"How Do AI Generators Make the Photos Actually Look Like Me?"
It's a pretty smart process. You start by feeding the AI a small collection of your own photos—just some casual selfies or pictures from your camera roll. The key is to provide a variety of angles and expressions. The AI then studies these images, learning the unique details of your facial structure to build a digital model of you.
Once it has that model, it can generate brand-new portraits. It combines your specific likeness with all the elements of a professional shoot: perfect lighting, clean backgrounds, and a range of business-appropriate outfits. The result is a whole gallery of studio-quality headshots that are authentically you, just placed into a perfectly polished setting.
Ready to skip the DIY setup and get dozens of studio-quality headshots in minutes? 43frames uses AI to create perfect, on-brand images instantly. Try it for free and see your results today.