Headshots White Background: Pro Tips for Sharp, Clean Portraits
Discover headshots white background techniques with DIY lighting, camera settings, and AI tools to achieve sharp, professional portraits that stand out.
Headshots White Background: Pro Tips for Sharp, Clean Portraits
A clean, crisp white background on a headshot isn't just a trend—it's the gold standard for a reason. It's clean, professional, and puts all the focus right where it belongs: on you. By stripping away all the noise and distractions, a simple white backdrop ensures your expression and personality are what people see first, making it the perfect choice for LinkedIn, company websites, and any professional profile.
Why White Backgrounds Make Your Headshots So Effective
![]()
Opting for a white background is less of a "safe" choice and more of a strategic one that elevates your professional image. The thinking behind it is simple: your headshot is about you, not what’s happening behind you. A clean, uncluttered canvas forces the viewer's eye directly to your face.
This approach immediately communicates a sense of modernity, clarity, and professionalism. When a recruiter or a potential client lands on your profile, there's nothing competing for their attention. You get to make a direct, confident first impression, and that connection is priceless.
The demand for this kind of polished imagery is booming. In fact, the professional headshot photography market is on track to hit an incredible $38.08 billion by 2025. This growth is fueled by the real-world results these images get—profiles with a professional headshot, for instance, get 21 times more views on platforms like LinkedIn. You can read more about professional headshot market trends to see just how big this has become.
Practical Advantages in the Real World
The power of a white background isn't just about looking sharp; it’s incredibly practical. It’s a foundational asset for any strong personal or corporate brand.
Just think about these common situations:
- Corporate Team Pages: Getting a consistent look for a remote or hybrid company's "About Us" page is a classic headache. A white background standard solves this instantly, creating a unified, professional gallery of faces no matter where or when each photo was shot.
- LinkedIn Profiles: Recruiters are scrolling through endless profiles. A punchy headshot on a clean white background stands out against the busy interface, making your profile far more likely to get that click.
- Speaker Bios and Media Kits: When you're being featured at an event or in an article, your photo has to drop into all sorts of different designs. A white background is the universal key—it looks great on any website, brochure, or event banner without clashing or causing design headaches.
The whole point of a headshot is to make you the subject. If the first thing someone notices is the background, the photo isn't doing its job. A solid, neutral backdrop guarantees your personality and professionalism are what people remember.
This timeless style also means your headshot won't feel dated in a year or two. It protects your investment and helps you maintain a consistent, recognizable brand image across all your professional channels.
Preparing for Your Photoshoot Like a Pro
A truly great headshot almost never happens by accident. It’s the direct result of smart, thoughtful preparation that begins long before you even think about picking up a camera. The first, most crucial step is to get crystal clear on the photo's purpose.
Who are you trying to reach with this image?
The answer to that question will shape every choice you make. A headshot destined for a conservative law firm’s website demands a completely different tone than one for a creative director’s portfolio. The lawyer might need a serious, confident expression, while the creative director probably wants a warm, approachable smile.
Defining your audience and the message you want to convey lays the groundwork for a compelling photo. It dictates your wardrobe, your expression, and the overall energy you need to project.
Choosing Your Wardrobe and Grooming
When you're shooting for headshots with a white background, what you wear is especially important. The whole point is to draw the viewer's eye to your face, not your outfit.
- Stick to Solid Colors: Busy patterns are distracting and can look strange on camera. Solid, rich colors like navy blue, emerald green, or burgundy pop beautifully against a white background and work well with most skin tones.
- Consider the Neckline: A V-neck can visually elongate the neck, creating a nice line, while a classic crew neck is a safe, timeless choice. I'd generally steer clear of turtlenecks unless they're a key part of your personal brand, as they can sometimes make you look a bit closed off.
- Ensure a Perfect Fit: Ill-fitting clothes, whether too tight or too baggy, just look sloppy. It's always a good idea to bring a few well-fitting options to the shoot so you have choices.
For grooming, the goal is a polished, authentic version of yourself—not a total reinvention. This isn't the time to try a dramatic new haircut or pile on heavy makeup. You want to look like you do on your best day. Simple, clean hair and a light touch-up to minimize shine are often all you need. If you're looking for more in-depth advice, these tips on how to take professional headshots at home are a great resource.
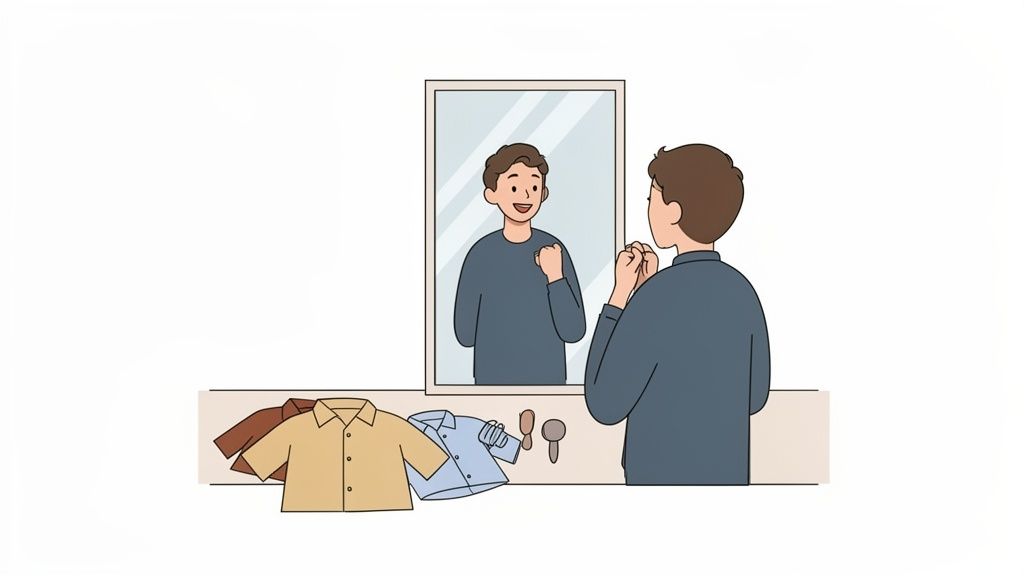
Practicing Your Poses and Expressions
Look, feeling a little awkward in front of a camera is completely normal. Pretty much everyone feels that way. The best way I've found to combat this is to practice in front of a mirror before the shoot.
It sounds silly, but spend a few minutes experimenting with different smiles, head tilts, and expressions.
The biggest mistake I see is a forced smile. It never looks right. You have to find that genuine smile that actually reaches your eyes—the Duchenne smile. That small detail is what separates a forgettable, generic photo from one that truly connects with the viewer.
Pay attention to how your posture changes how you feel. Standing up straight with your shoulders back doesn't just look better; it actually makes you feel more confident. Try out a few slight head tilts to see what angles feel most natural. A little bit of homework here goes a long way in making you feel more relaxed and in control when it's time to shoot, and that confidence always shines through in the final images.
Your Camera Settings for a Crisp White Background
Dialing in the right camera settings is where the magic happens. This is how you transform a basic photo into a professional headshot with that perfect, pure white background. It might sound a bit technical, but a few key adjustments are all it takes to go from a dull, grey backdrop to something brilliantly clean. It all boils down to controlling the light that hits your camera's sensor.
Think of these settings as your foundation. Getting them right in-camera saves you a mountain of editing work later and ensures your subject is perfectly sharp and well-lit.
Mastering the Exposure Triangle
The soul of any good photograph lives in the delicate balance between aperture, ISO, and shutter speed. For a professional headshot, the goal is simple: keep your subject's face completely in focus while making the image bright and free of distracting digital noise.
- Aperture (f-stop): This setting determines how much of your photo is sharp. While a super-wide aperture like f/1.8 creates that dreamy, blurry background, it's often too shallow for headshots, leaving the tip of the nose sharp but the ears out of focus. The sweet spot is usually between f/4 and f/8. This range gives you enough depth of field to keep all the important facial features tack-sharp.
- ISO: Always keep your ISO as low as your lighting will allow, ideally at ISO 100 or 200. Pushing the ISO too high introduces that grainy, fuzzy look known as digital noise, which immediately cheapens the look of a professional photo. You can bump it up if you're in a pinch with low light, but always start low.
- Shutter Speed: To freeze motion and avoid any hint of blur, a shutter speed of at least 1/125th of a second is a safe bet, especially if you're shooting handheld. If you have your camera locked down on a tripod, you can get away with something a bit slower.
This combination of settings is a workhorse in the corporate headshot world, a niche that has exploded into a massive market. The industry, valued at around $2.5 billion in 2023, is built on producing these kinds of clean, versatile images. And for good reason—with 85% of LinkedIn users reporting that a polished headshot gets them faster responses from recruiters, the technical details really do matter. You can dive deeper into the business headshot photography market to see just how much it has grown.
Here’s a quick reference to keep handy during your shoot.
Camera Settings for White Background Headshots
| Setting | Recommended Range | Reason |
|---|---|---|
| Aperture (f-stop) | f/4 - f/8 | Ensures all facial features are sharp, from nose to ears. |
| ISO | 100 - 200 | Minimizes digital noise for a clean, professional image. |
| Shutter Speed | 1/125s or faster | Prevents motion blur, especially when shooting handheld. |
| Focal Length | 50mm - 85mm | Avoids distortion and creates flattering facial proportions. |
| White Balance | Custom/Kelvin | Guarantees accurate skin tones and a pure white background. |
Getting these settings dialed in before you start shooting will make the entire process smoother and the final results far more impressive.
Choosing the Right Lens
The lens you put on your camera has a huge impact on how a person looks in a photo. A wide-angle lens (anything under 35mm) will distort facial features, often making the nose look bigger—a look pretty much nobody is going for.
For flattering, true-to-life portraits, a prime lens between 50mm and 85mm is the industry standard. This focal length range compresses the scene just enough to capture facial proportions naturally, without any weird distortion.
An 85mm lens, in particular, is often called the perfect "portrait lens" for this reason. It lets you stand a comfortable distance from your subject while still filling the frame, which helps them feel less crowded and more relaxed. That comfort almost always translates to more genuine, confident expressions.
And once you've nailed the shot in-camera, our portrait and LinkedIn headshot presets can give your images that final, professional polish with just a single click.
Mastering Your Lighting Setup for a Perfect Look
Let's be honest, lighting is what makes or breaks a headshot. It’s the one thing that truly separates a quick snapshot from a polished, professional portrait. When you're aiming for that clean white background, the biggest mistake I see people make is just pointing a bunch of lights at themselves and hoping for the best. That's a surefire recipe for a muddy, grey background.
The real secret is to light your subject and your background as two separate things. You need to dedicate at least one light (ideally two) just for the background. By making those lights a little bit brighter than the light on your subject, you can push the background to a pure, crisp white without blowing out the details on your face. This little trick is the foundation of that high-end studio look.
The Classic Three-Point Lighting System
If you want that timeless, professional feel, you can't go wrong with a classic three-point lighting setup. It’s the industry standard for a reason—it gives you incredible control to sculpt the light, create dimension, and make anyone look their best.
Here’s how it breaks down:
- Key Light: This is your main light. I usually place it about 45 degrees off to one side of the subject. It’s your strongest light and it sets the entire mood.
- Fill Light: Placed on the opposite side, this one is less intense. Its only job is to soften the shadows created by the key light so they aren't too deep or distracting.
- Back Light: Sometimes called a hair light or rim light, this goes behind your subject, often pointing down at their head and shoulders. It creates that subtle, glowing outline that pulls them away from the background and adds a beautiful sense of depth.
Here's the pro tip: The two lights aimed at your white backdrop are your secret weapon. Place one on each side and point them straight at the background. Dial up their power until the background reads about one full stop brighter on your light meter than your key light. That's how you guarantee it goes completely white in the camera.
Getting your lighting right is only half the battle; your camera settings have to work with it. The flow is pretty straightforward once you get the hang of it.
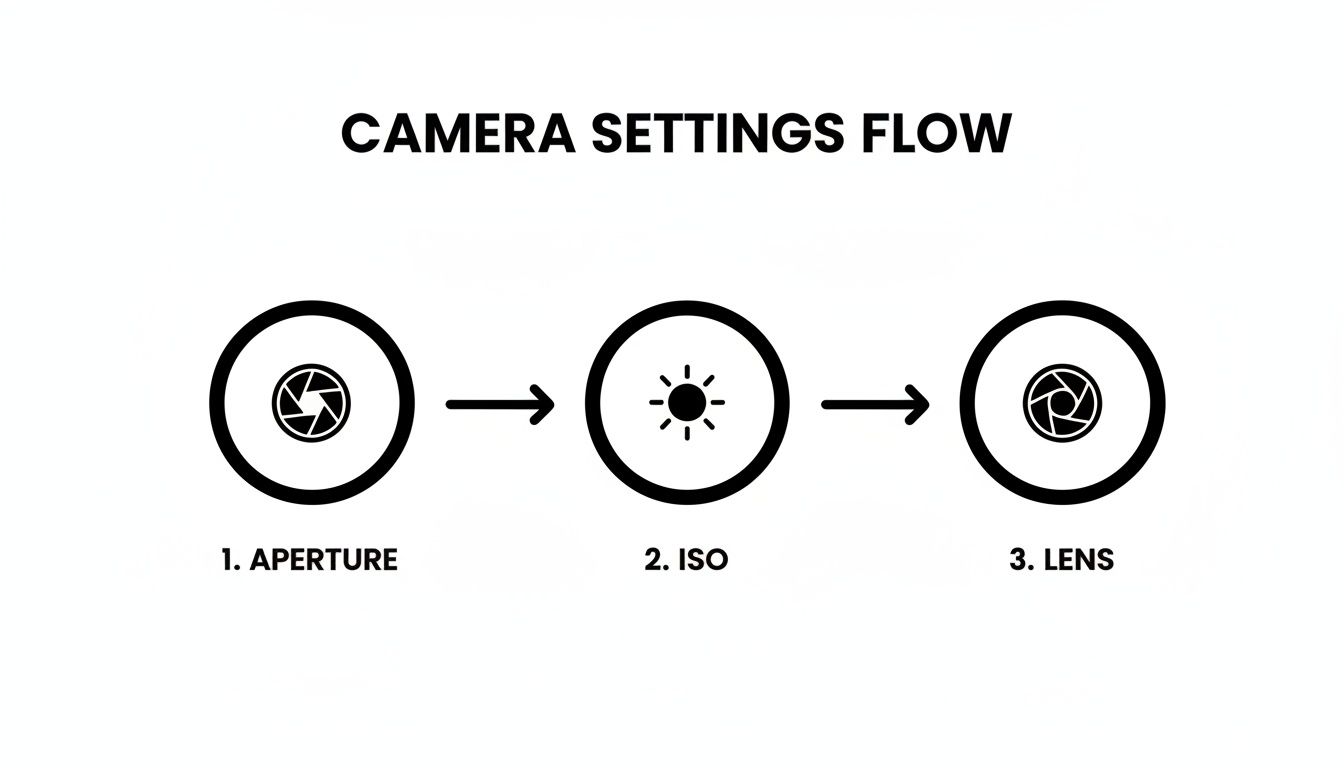
This just hammers home how aperture, ISO, and your lens choice all play together. Nail these, and you're well on your way.
A Smart DIY Lighting Setup on a Budget
Look, you don't need to drop thousands on studio gear to get fantastic results. A little ingenuity goes a long way, and you can build a great setup with things you might already have lying around.
Your best friend here is a big, bright window. Natural light is soft, flattering, and, best of all, free. Just set yourself up facing the window, and you'll get gorgeous, even light across your face.
What about the shadows? Easy. Grab a cheap piece of white foam board from any craft store and use it as a reflector. Hold it on the side of your face that's away from the window. You’ll see it immediately bounce that beautiful light back, softening up any harsh lines. To help out your background, you can even place a simple desk lamp behind you and point it at the wall. This little boost can make all the difference, giving you a surprisingly professional look for next to nothing.
The AI Shortcut to Perfect White Background Headshots
After digging into all the technical details of camera settings and lighting, the thought of setting up a mini-studio can feel a bit overwhelming. But what if you could skip that whole process and still get flawless, professional results in just a few minutes? Modern AI tools give you a powerful and incredibly fast alternative.
Imagine you're a marketing manager who needs to update the company's "About Us" page. Your team is scattered across three different continents, making consistent headshots a logistical nightmare. This is exactly where an AI workflow comes in, transforming a project that could take months into a simple afternoon task.
This new approach sidesteps the usual hurdles of cost, time, and technical skill. It’s all about working smarter to get that polished, professional look without all the traditional friction.
From Existing Photos to Professional Headshots
The process is refreshingly simple. Instead of trying to coordinate photoshoots, you can just ask each team member to upload a few clear, existing photos of themselves. From there, you pick a specific style from a library—in this case, you’d choose a clean, professional headshots white background preset.
The AI then does its thing, generating dozens of high-quality, on-brand options for each person. The results are not only consistent in lighting and style but also ready to go straight onto your website, into marketing materials, or on LinkedIn profiles.
This method truly opens up access to high-quality headshots. It puts the power of a professional studio into anyone's hands, letting teams achieve perfect brand consistency without the high cost and complexity of traditional photography.
This shift has a huge impact on the budget. Professional photographers are fantastic, but their services can get pricey, especially for a whole team. Individual sessions can easily start at $325 for a single image, and corporate rates often begin around $500 per person. While the return is strong—like a 35% higher acceptance rate on LinkedIn—AI offers a compelling alternative at a fraction of the cost. You can learn more about current headshot photography trends to see how the market is changing.
Unlock Speed and Perfect Brand Consistency
The real wins go beyond just saving money. The most significant advantages are the incredible speed and the effortless brand consistency you can lock in.
- Instant Results: Forget waiting days or weeks for a photographer to schedule, shoot, and edit. You get a full gallery of options in seconds.
- Guaranteed Consistency: By using the same AI style or even training a custom model on your brand's aesthetic, every single headshot will have the exact same lighting, mood, and background.
- Ultimate Flexibility: Need a version with a slightly different expression or outfit color? You can generate new variations on the spot without needing a whole new photoshoot.
This approach is a game-changer for remote-first companies or large organizations where a unified visual identity is non-negotiable. Using these tools ensures every team member looks polished, professional, and perfectly on-brand. For more on this, check out our guide on using AI-generated headshots for LinkedIn.
Common Questions About White Background Headshots
Even with a perfect plan, you'll still run into questions when you're in the thick of a headshot session. I get asked these all the time, so let's walk through some of the most common sticking points, from what to wear to the technical traps you need to avoid.
What’s the Best Color to Wear Against a White Background?
Stick with solid, rich colors. Think jewel tones—a deep navy blue, a classic emerald green, or a rich burgundy. These colors pop beautifully against a pure white background and tend to flatter almost any skin tone.
It's a good idea to steer clear of white, cream, or very light pastels. They can easily get lost in the background, making you look washed out. While black can be a powerful choice, it sometimes crushes the details in the shadows, so you have to light it carefully. Ultimately, the best color is one that makes you feel great and keeps the focus where it belongs: on your face.
Can I Actually Get a Good Headshot with My Phone?
You absolutely can, but you have to be smart about it. The cameras on today's smartphones are fantastic, but you can't just point and shoot. Always use the rear-facing camera, as its sensor is much better than the selfie cam's. If you're working with a background that isn't perfectly white, Portrait Mode can be your friend, helping to blur out any imperfections.
The real secret to a great smartphone headshot isn't the phone—it's the light. Find a big window and face it. That soft, natural light is incredibly flattering. Whatever you do, turn off the on-camera flash. A cheap tripod to keep your phone stable and a piece of white poster board to bounce some light back into the shadows will make a world of difference.
It won't be identical to a high-end studio shot, but a well-lit and thoughtfully framed phone photo can look surprisingly professional.
How Do I Make Sure My Team’s AI Headshots All Look the Same?
This is where AI really shines. For dead-on consistency across an entire team, the best approach is to use a custom model training feature. This means you feed the AI a handful of reference photos that perfectly capture your brand’s look—the exact lighting, the specific mood, everything.
The AI essentially learns your style and then applies that DNA to every single headshot it creates. If you need a faster option, just make sure everyone on the team uses the exact same preset from the library. The key is to also give them simple instructions for their source photos—looking straight ahead, good lighting, simple background—to give the AI the best possible material to work from.
What’s the Biggest Mistake People Make with White Backgrounds?
By far, the most common error is failing to light the background separately from the person. Most people will set up a light or two, point them at the subject, and just hope the white wall behind them comes out white. It never does. Instead, you get a muddy, uneven gray background, often with a big, distracting shadow of the person's head.
To get that brilliant, pure white look, the background needs its own dedicated light. Not only that, but you need to make the background slightly brighter than the light falling on your subject. This technique, often called "blowing out the background," is what separates amateur shots from professional ones. It’s the secret to that clean, high-key studio look.
Ready to bypass the entire technical setup and get incredible headshots in minutes? With 43frames, you can create a whole gallery of professional, on-brand images without ever touching a camera. Train a custom AI model on your brand's unique style or pick from dozens of presets to nail that perfect white background look instantly. See how it works and try it for free.